Showing posts sorted by date for query wordpress. Sort by relevance Show all posts

Tutorial In Using SEO Tools Features For NextWapBlog

Next Wap Blog Logo

Guideline Tips Tutorial In Using SEO Tools Features For NextWapBlog

Hello... to my nextwapblog friends, in the encounter earlier this year we launched the latest features to support your blogging activities. And we think the features we add will be very useful as they relate to the Google index. Here we give a little explanation of features seo tools for nextwapblog.

Read Also

How to Install & Setup WordPress SEO Plugin by Yoast - 7 Ways to Help You


1. For the first feature is uploaded sitemap with XML format, you can use third party Sitemap Generator or use feature of equipment to get file with XML format that can be uploaded in your blog. Then my friend can submit sitemap earlier in Google Webmaster.


2. For the next feature is Trending Keywords can be used to see what keywords become trending in each country. The results of trending keywords will always change every day, so take advantage of this feature to write content that is being trending in search engines.


Guidelines Tips On How to Create An SEO Friendly Blog


3. Next feature is Keywords Generator function to search for any keywords related to the main keyword that we type. For the number of results will be different on each keyword.


4. Keywords To Url, serves to make keywords into Url, by filling in the url base column, permalink, dash, and extention.


5. Url To Sitemap, to create a url to xml. By making the url to xml then my friend can directly upload the xml file was a sitemap that can be submitted in Google Webmaster.


SEO Tips For Beginners - Guides to Search Engine Optimization


We will give you a little tutor to use the latest features of NextWapBlog.


Click Keywords Generator, type a keyword I give example "expert lheeman" then click Generate.


Wait until you get the results you want, if it is enough just click Stop Generator.


Copy all the keywords in the textarea


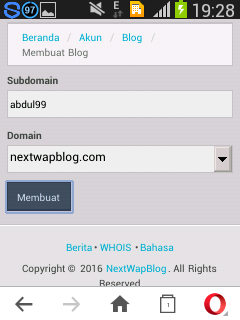
Click keyword to url then fill

On Page SEO Optimization For Your Blog - SEO Tips


Your Base URL: your blog address


Permalink URL: url address for permalink


Dash: hyphen bridge


Extention: url format


Then paste keywords that my friend had copied Keywords then click Process Keywords To URL List.


* Note: You must fill in the column according to your intelligence for sitemap search and for other sitemap then url permalink, dash and extention can be adjusted.


Copy results from Keywords to Url in textarea
Click Url To Sitemap, paste the results from Keywords to Url was textoled columnol pareity then 0.8 then click Process Keywords To Sitemap.


Best Free SEO Tools in Supporting Learning With Software


Automatically you will download the file in xml format and following sample result.


Click Dashboard - Sitemap and click Upload, select the file that is formatted xml to upload.


Click the file, and now you have finished uploading sitemap and can be submitted in Google Webmaster.


Actually there are many other things that can be done with the features seo tools nextwapblog, my friend can create sitemap categories, search, tags, postings, Of course by adding sitemap then your blog will be indexed faster and very useful for blog grab. To encounter this time is enough until here, if there are questions can write in columned comments space..


You Can Also Read This In Indonesia Language : Tutorial Menggunakan Fitur SEO Tools NextWapBlog

Expert Lheeman

How to Reduce Blog Bounce Rate by Changing Font Size

How to Reduce Your Blog and Website Bounce Rate

Ways on How to Reduce Blog Bounce Rate by Changing Font Size

Understanding SEO Friendly and User Friendly in Blogging - Best SEO Trick

This topic is in relation to....

What is a good bounce rate ?

How to reduce bounce rate

Bounce rate benchmark

Average bounce rate by industry

Bounce rate formula

Bounce rate benchmark (2016-2017)

Exit rate

Ideal bounce rate


CHANGE the font-size of your blog becomes larger in order to reduce Bounce Rate that affects PageView and PageRank of blog. That's advice Daily Blog Tips in Reducing Your Bounce Rate In One Second.


21 Ways on How to Increase Blog Website Visitors & Traffics


On that suggestion, EXPERT LHEEMAN changed the size of the post body with single letter to 14px, larger than before, as well as changing the font, from Tahoma, Arial, and now Droid Sans.


Why 14px and Arial? Simple course, ExpertLheeman "Bloggy" Wikipedia which also change the size and type of letters to Arial 14px. The "leading" news sites in the world also mostly use Arial 14px. Just look at CNN and BBC for example.


How to Avoid Mandatory Blogging Mistakes and Prevent Your Blog From Scratch


Can letters be the cause of Bounce Rateblog? The answer, according to Daily Blog Tips, is YES. "There are many cases where you can reduce the bounce rate, and increase the font size works on most situations," he wrote.


"Consider also the age of visitors who are getting older so that more and more people who need a large letter and comfortable to look at - not make eyes tired," he added.


Could be, because the size of the letters on our blog is too small, visitors hurry to close our blog and click the back button on Google. They are looking for other blogs that have larger font size and are easy to read (scan-scanned).


Just glance at the blog, then quickly close it and go back to Google's search results index, that's called Bounce Rate.
Google says, many factors cause this "bounce rate", one of which is the design (site design) or usability issues.


There are a number of factors that contribute to your bounce rate. For example, visitors may leave your site from the sign-in page if there is a problem with site design or usability issues. Alternatively, visitors may also exit the site after viewing a single page if they find the information they need to be on the page and find it unnecessary or uninterested to visit another page.


The Best Host to be Making Money Through Blogging : WordPress or Blogspot ?


Clear ...? Let's take a small step that can have this big impact. Trivial, just changing the size of the letters doang, but can be "worth SEO"!


We can also "reflect" on news sites such as Republika Online, Inilah.com, Tempo.co, or Kompas.com that use the capital letters, namely Arial 14px, in single-post it. The leading news sites, detik.com, use the letters Arial 13px.


Do not forget to choose "Web Safe" fonts or good letters for blogs like Arial, Helvetica and Tahoma, or use Google Fonts.


18 Successful Blogging Tips for Blog Beginners - Guidelines For Bloggers


Expert Lheeman

How to Auto Share Blog Post to Facebook, Twitter & Google+

Facebook, Twitter and Google Plus + Featured Logo

How to Start Automatically Sharing Of Blog Posts to Facebook, Twitter and Google+ Within A Minute

21 Sure Ways on How to Increase Your Blog Website Visitors & Traffics

SHARE updates of blog posts to social media Facebook, Twitter, and Google Plus are part of SEO Tips, known as "SEO Social Media".


Social media proved effective to increase the number of blog visitors (traffic). Social Media also became one of the three pillars of SEO, in addition to Content and Links.


This time ExpertLheeman will shared about how to share automatic blog posts to Facebook, Twitter and Google Plus.

Share Automatically to Facebook

How to automatically share a blog post to Facebook is very easy. How? create an account in Networkedblogs and register your blog there.


After successfully creating an account, click on the menu "Register New Blog" and "Syndication". Make the settings as requested or fill in the form provided there.


Do not Under estimate Share on Google Plus Blog Postings - Bloggers Advise


Once everything is complete, we can share our blog post automatically to Facebook and Twitter. Can be to personal accounts, page, and Facebook groups at once.


Perhaps because of "sell well", NetworkedBlogs can no longer accept new blog registrations. Instead and it could be better, we can use Dlvr It.
Dlvr.it helps publishers deliver their content to the social web, including twitter and facebook.

Share Automatically to Twitter

Share blog post automatically to twitter already at once too 'can share to Facebook via Networkedblog. Can also automatically share to Twitter via FeedBurner account.
How to create an account in FeedBurner and register our blog there. Insert blog feeds with formats, for example, blogexample.blogspot.com/feeds/posts/default and click NEXT and so on.


If it is successful, there will be menu "Socialize" and "Publicize". Enter your twitter account, then every blog update, post will automatically appear in your twitter account.


After entering a Twitter account that will share automatically to, please open your Twitter account and link with Facebook, so posts that appear on Twitter automatically also appear on Facebook.

Share Automatically to Google Plus

Google Plus has become Google's first choice in ranking blogs. That's because Google Plus is Google's social media. Naturally if "existing", as he managed blogspot blog rather than wordpress.


Well, to automatically share to Google Plus, first of all we must have a Google Plus account. Which blog account is still a "Blogger Profile", please change (upgrade) to Google Plus.


After that, in the Blogger Dashboard there is click "Settings" then click menu "Posts, Comments, and Sharing". To auto share to Google Plus please setting at the bottom menu, with Share to Google.

Setting Google Authorship

It will be more stable if we also set Google Authorship, the proof of ownership of the blog. Google really likes if a blog is clearly the owner, that is the same as Google Plus account.


How, please read the guide on Google Authorship. Locate a code like this, which is stored under the code :


In addition, ExpertLheeman also includes a Google Plus account link for "Posted by ..." For example, click "Post by ExpertLheeman Blogger" under the heading of this post.


It's been long ago Google deleted Google Authorship. In fact, recently Google Publisher disappeared in Google Structured Data Testing Tools. I think Google is increasingly focusing on Quality Contents. Content is King!


8 Sure Ways on How to Increase your Blog Pageviews


Expert Lheeman

21 Ways on How to Increase Blog Website Visitors & Traffics

How To Increase Your Blog Vistors And Traffics

How to Avoid Mandatory Blogging Mistakes and Prevent Your Blog From Scratch

Sure Ways on How to Increase Your Blog Website Genuine Visitors and Traffics

How to Increase Number of Blog Visitors (Traffic, Pageviews).


Your BLOG is lonely reader? Below ExpertLheeman share and sync on how to increase the number of visitors or blog readers Daily Dream Tips version.
In essence, focus on Content or Content Blog quality - own writing, it takes a lot of people, and polish with basic SEO techniques.


ExpertLheeman version, How to Increase the number of Visitors Blog there are two, namely using seo friendly template (responsive & fast loading) and create Quality Content in accordance with Google guides.


Content is KING. The content or blog post is king, the determinant of blogging success. Choose a niche blog in accordance with your passion alias talents and interests. Do not force to write content that you do not master, especially most COPAS from other blogs with edit here and there become as if your own.


Better blogger speak other Languages, translate, and add with your own words and thoughts, as this post. Do not forget to mention the source if you do not want to deal with Google's DMCA for copyright infringement that could get your blog banned or deleted.

6 Ways to Increase Blog Visitor Count.

Write the Best Content


You WILL NOT be successful in blogging without good content.


2. Allow Email Subscribe - Subscriptions via Email

Create subscription form posts via email so that users can follow your blog content updates via email inbox. Perhaps many are not interested in subscribing via email, but many are also interested!

The Best Host to be Making Money Through Blogging : WordPress or Blogspot ?


3. Build Relationships with Other Bloggers
Connect with other bloggers. We know it as a "way to blog people" (blogwalking).


Comment on their blog and leave a link to your profile or blog. A good blogger is a blogger who does not stingy comments on other blogs. Many blog visitors to ExpertLheeman Blogger from the results of comments on other blogs.


4. Write on Other Blogs and Receive Other Blogger Posts as well.
This is known as Guest Post - guest post. You write for another blogger, or your blog receives another blogger's posts.


By the way ... ExpertLheeman Blogger is also ready to become a Guest Author and ready to accept your writing (as long as the original yes, not Copas, and not yet posted on your blog :))


5. Do not Just Think About SEO!
SEO is important, but to increase the number of blog visitors is not enough just with SEO techniques. Many blogs are "not wrecked", can perched in the first position of Google. That's because of quality content, great writing and searchable people!


6 .... But Learn Basic SEO
Although SEO is not everything to increase the number of blog visitors, but really need brain- tweaking SEO Blog, at least the basics, such as using keywords in the title and create many links between blog pages.


EXPERTLHEEMAN version of mah, the basic SEO is mainly:
1. Use SEO Friendly Blog Templates

2. Use SEO Friendly Meta Tags

3. Write Quality Content

4. Make internal and external links.

5. Frequent gathering with other bloggers!

SEO Tips from Google to Raise Number of Blog Visitors

Well, if this is SEO tips directly from the Google Team itself.

1. Do something nice: Be sure your website stands out from the competition.

2. Include relevant words in your copy: Try to put yourself in the shoes of searchers.

3. Be smart about your tags and site architecture.

4. Sign up for email forwarding in Webmaster Tools to get notified by Google if anything is wrong.

5. Attract buzz: Natural links, 1s, likes, follows - all these can help.

6. Stay fresh and relevant: Keep content up-to-date on your site to keep receiving organic traffic.


Similarly How to Increase Number of Blog Visitors.
How To Increase Your Number of Visitors Blog Version ...?

18 Successful Blogging Tips for Blog Beginners - Guidelines For Bloggers


Expert Lheeman

Tips on How to Choose the Best Theme for Your Blog Niche

How to Choose Best Theme for Your Blog Niche

Tips on How to Choose the Best Theme for Your Wordpress And Blogger Blogspot Blog Niche

Read Also : How to Build a Network Blog for Mutual Beneficial and Ways on How to Become an Authority Blogger In Your Niche Skills
Tips on Choosing a Good Blog Theme - We recommend that before you start blogging you must determine the theme of blog first because it determines your blog in the future.


Is It Important in Choosing Blog Theme? The answer of course is capital "YES" because it will affect the contents of the blog that you will create and affect the number of visitors or the target number of blog visitors. Since each blog theme has a different percentage in the number of enthusiasts.
Read Also : Understanding SEO Friendly and User Friendly in Blogging - Best SEO Trick and Note A Full Time Blogger : To the Dot Com Lifestyle
For example if you choose the theme of agriculture then the number of visitors who search for themes about agriculture will be less than the theme of online business. Because it will affect the SEO process.


Furthermore, if you are wrong in choosing a theme then most likely you will encounter problems like the following.
*. You will run out of material for your blog articles
Read Also : SEO Tips For Beginner's Guides to Search Engine Optimization

*. Your blog will be difficult to compete with other blogs.

*. And you will feel bored managing your blog Based on the above then the stage of choosing a blog theme is something very important because if you just ignore then in a few months your blog will sink and may not get a place.


No wonder many novice bloggers who fail because of underestimating or ignoring the stages of choosing a theme.
Read Also : Explanation on How to Become a Confidence Blogger
How to Choose the Best Theme? Actually the answer to this question is in yourself. Because you can determine the theme of the blog based on the ability that you have.


Or you can answer some of the following questions...
1. What is your goal to create a blog?

2. Is your blog a means of sharing?

3. Is your blog used for business? Please think based on your brother's ability because if you force to create a blog with themes that you do not master then you might loosed up as I've said earlier
Read Also : The biggest dream I Have For Blog (Being a Part/Full Time Blogger)


Many beginners who follow-up to create a blog that they do not master the knowledge because tempted by a successful blog.

What's Your Blog Theme? How have you got enlightenment on how to choose a blog theme? If not the following I will give you a list of common blog themes, please choose based on your bass or ability and knowledge
Read Also : Habits, Ways and Beliefs of Successful Blogger and How They Manage Their Blog for More Success
1. Music
2. Sports
3. News
4. Automotive
5. Entertainment
6. Art
7. Business
8. Reference
9. Education
10. Game
11. Computer
12. Recreation
13. Internet
14. Blogging
15. Religion
16. Social
17. Private || Etc.
Read On : How To Create Free Blog At Blogspot and Start Making Money


You can choose two or more blog themes that are still interconnected, the example is usually the theme of the internet can be related to the theme of blogging etc., you should choose related to your hobby for your blog will be useful and not in vain.


Read Also : How to - Download, Save Pictures on Computer Screen and Create ScreenShot

Hopefully everything can help you and then you need to learn how to research keywords to help build a powerful blog.


Read Also : 3 Sure Ways on How to Make Money from your Blog

Expert Lheeman

How to Write a Good and Quality Posts for Your Blog Readers

How to write a good blog posts

How to Write a Good and Quality Genuine Posts, Articles or Contents for Your Blog Readers

Read On : How To Easily Install Google AdSense Ads in WordPress
How to make good and quality articles? The answer of course is still related to the previous post is by entering keywords that we have selected previously. If you do not know how to choose keywords then you can read the previous article on HOW TO CHOOSE KEYWORDS


After you've choosen many keywords and will be in the article we must consider the following important factors:

1# Select Article Title

*. If you are already adept at choosing keywords you can certainly vary the keyword to make the title of the article. We recommend the length of the article title to be 5-7 words. Because the longer the keyword quality will decrease in it. If you are going to make a hefty article title do not sacrifice keywords in it. For example, if the title of the article is "The price of the sport shoe down against discounts is up to 50 percent"quite replaced with "Wow! Sports Shoes Discount is 50%"

2# Choose Article URL

*. If you look at the page to create an article on the right there is a menu called Permanent Link, it's function is to determine the URL of the article you created but if the title of your article is too long then usually the title will not load all, you can change the url of your article by Clicking on the permanent link menu.
Read Also : 7 Suggested Ways to Know That Your Blog Needs Readership

Permalink
*. Another simply type in the last part of the URL or title of the very long article. Do not forget to connect the sign (-). That way the URL will be more SEO Friendly.

3# Mark Every Article With Labels

*. If your blog has some discussion use the label according to the type of articles you create to group them. Function to help the flow of page rank to the page of your blog article (This is just an Aditional).

4 # Create Optimized Articles

*. We recommend that you create an article by following these rules:

Long article minimum 500 words.
Read On : How to Build a Network Blog for Mutual Beneficial

Each keyword is repeated at least three times (opening, content, closing).

The earliest keywords in the bold or in the tilt.

Use standard language so that if translated into another language can be indexed

5# Adding Images In Articles.

*. Good articles usually use images that match the theme of the article and also describe the article. Make sure your image is not too big, because it can affect page loading. For blogspot users, images are uploaded while writing articles, and do not host other image hosting. Because sometimes other hosting can not keep up with the speed of laoding images from blogspot during peak hours.

6# Installing Links In Articles

*. If there are related articles between one and the other you can install links and follow the following tips:
*. Make sure all links are open in a new tab
Read Also : 8 Sure Ways on How to Increase your Blog Pageviews

*. Keep at least two links to your related articles.

7# Make Sure Your Articles Are Able To Answering The Problem Or Providing The Information In The Reader Search

*. This aims for readers interested in reading other articles because your articles are able to provide information they are looking for and their children come many times to your blog. This is very good for that your blog page rank increases.
Read Also : On Page SEO Optimization For Your Blog

8# Installing Meta Title Tag

*. Set the meta title tag so that your article will be indexed by search engines. The above points can help you to improve the quality of articles that you will create, and hopefully can make your blog article indexed better.


That's more or less on how to create quality SEO articles may be useful.

Greeting blogger.
Read Also : 18 Successful Blogging Tips for Blog Beginners - Guidelines For Bloggers


Expert Lheeman

Best Free SEO Tools in Supporting Learning With Software

Best Free SEO Tools in Supporting Learning With Software

Best Free SEO Tools in Supporting Learning With Software

Read Also : Preparation For SEO Before Starting A New Blog
Best Free Supporting Tools in Learning SEO - Friends will all learn seo or are learning seo? Learning seo will never cease, as I said on the previous occasion that you could have developed your own seo techniques.
Read Also : How to Edit Blogger Template


For that on this occasion I will give some best seo tools as a support in learning seo for you.
These tools may be up to now not so important to you but I am sure one day you will need it.
Read Also : Basic SEO Tips for Blogger Blogspot from Google


Before you install this tool you should use mozilla firefox as your browser because in addition for easy to install this tool is also a lot. Here is the best tools seo buffer learners I recommend.
1. Alexa Toolbar
2. Pagerank Checker
3. SEOquake

#1. Alexa Toolbar

Read Also : How to Install & Setup WordPress SEO Plugin by Yoast
In the tutorial on how to decrease-streamline alexa rank quickly I've explained what the function of alexa toolbar is, so alexa toolbar is very influential at all for the assessment of your blog so that within 1-2 months your alexa rank can reach plus or minus 500.000 an. So if you want more streamlined alexa then invite other readers also to install alexa toolbar is because the alexa assessment is on the toolbar installed in the browser of your blog visitors. Besides that also do you know alexa rank has nothing to do with seo. It's just that having a small alexa rank is important for business blogs because it shows the reputation of your blog, at least an advertiser that will put an ad on your blog know that your blog has a reputation.
Read Also : Understanding SEO Friendly and User Friendly in Blogging


Having a small alexa rank also seems to be a dream of bloggers who have a goal for business, of course, alexa rank is usually a reference for a visitor that this blog has a great reputation and most importantly is a sign that this blog is not a new blog yesterday afternoon . So please install alexa toolbar to streamline your alexa rank and invite also your visitor blog.

#2. Pagerank Checker

Read Also : How to Create An SEO Friendly Blog
This tool serves to make it easier for us to know the pages we visit have homework, this is very helpful when we are looking for backlinks because the greater the page rank of the page then the more positive impact also backlinks that we get and most importantly the backlink is dofollow.

#3. SEO quake

Actually this SEOquake already includes two tools before, yups seoquake is equipped with features to find out how the value of alexa rank or page rank of a blog, but seoquake is very sensitive because if you always activate seoquake this search engine can detect that your blog is a spam blog, so its use should be considered therefore turn off seoquake if you are not analyzing a page or blog.
Read Also : SEO Tips For Beginner's Guides to Search Engine Optimization


In addition, this seo-quake advantage is to help us understand the on-page seo structure of blogs that we analyze or our competitors. So you can know if our competitors understand the onpage problem or not. Please install this seo-quake but remember to turn off this tool if you do not need it.


Up here please install these three tools to support your seo learning but if you are not pleased it is not a problem for me. Because so many SEO master has said it is not important.
Read Also : On Page SEO Optimization For Your Blog


Expert Lheeman

SEO Tips For Beginner's Guides to Search Engine Optimization

SEO For Beginner's Guides to Search Engine Optimization

SEO For Beginner's : Guides to Search Engine Optimization

SEO OPTIMIZATION FOR BEGINNERS - most beginners to do seo optimization may be so confusing, not even a few beginners who are desperate because they do not get maximum results.
Read Also : Gists on How to Make Money from Blogs - Tips to Become a Successful Blogpreneur and How to Install & Setup WordPress SEO Plugin by Yoast - 7 Ways to Help You

Build a popular blog is not for a while, and the way it is done is not easy, at least you need 3 months to make your blog crowded then even if you are not lazy to find backlinks and create quality articles.

So if you are a beginner and still confused how to do optimization on blogs just follow the following seo optimization checklist, here is the first step or the basic part to make your blog crowded with visitors.
Read Also : How to Make Posts That Will be Liked/Loved by Readers and Google and How to Make Money from Blogs - Not Just Google AdSense : Make Money Online Blogging

1. Make a quality article

The purpose of blogging - here is an article that can provide a solution for a problem. Try to think if your article is able to answer questions from visitors of your blog then automatically visitors will be satisfied with your blog and so they will become loyal visitors, even recommend your blog to other visitors.

2. Do seo optimization onpage

If you already understand seo you will realize how important seo onpage optimization is, but you do not need to worry because I have summarized how to optimize your blog in terms of onpage. Please read on How to Do An On Page SEO Optimization For Your Blog - SEO Tips. If you are still a beginner and do not understand or do not want to bother doing onpage optimization points you can also use a seo friendly template that I have applied its onpage optimization please download and install on your blog.
Read Also : How to Upload Pictures / Photos Right to Blog Posts for SEO and Improve Blog Traffics and Understanding SEO Friendly and User Friendly in Blogging - Best SEO Trick

3. Looking for backlinks and promote your blog.

There are so many ways you can do to promote and search for backlinks, for those of you who are beginners you need to do is visit the blog that still has the same theme with your blog, take lessons from each visit you do and don't forget to comment or ask if there is Things you do not understand. And make good friends. Next tell your friends about the blogs that exist and do not forget to invite them to visit and promote your blog. Of course your blog must have a quality article.

Do the above steps well, after you have a lot of quality articles, the right onpage optimization and promote your blog, then you try to understand more intensive seo and support points, I am sure within 3 to 6 months your blog will already has good traffic, The point is to be patient and keep trying.
Read Also : Basic SEO Tips for Blogger Blogspot from Google - Fast Google crawler for Blogspot

It is a trick or tutorial from my own. I dare to give the tutorial based on the experience that I have ever experienced and I keep trying to make a simple way so that the beginners can understand seo easily according to the vision and blog url of this "www.expertlheeman.xyz".

I think it's enough till here first please do the above checklist well after you understand the intent or purpose of the checklist above I will try to provide supporting articles such as how to search for backlinks, nofollow and dofollow backlink differences and knowledge of seo and other blog tutorials.

If you think this article is useful please share with your friends and do not hesitate to ask if you do not understand or still there is not clearance.
Read Also : Basic SEO Tips for Blogger Blogspot from Google - Blog Website Seo Trick


Expert Lheeman

On Page SEO Optimization For Your Blog - SEO Tips

On Page SEO Optimization For Your Blog - SEO Tips

On Page SEO Optimization For Your Blog - SEO Tips

Read Also : SEO Tools For Mozilla Firefox to Generate More Traffics to Your Blog/Website
Onpage SEO Optimization For Your Blog Trafic - In the world of seo known as onpage seo and offpage seo, the two things mentioned is a mandatory step that must be taken if your blog wants to be on page #1 of Google.
Read Also : Basic SEO Tips for Blogger Blogspot from Google - Fast Google crawler for Blogspot

Onpage seo optimization is more aimed at helping Google index your blog accurately, and off page optimization is more towards finding backlinks and promoting your blog so these two optimizations are very important.
Read Also : How to Remove Date Stamp Time from Google Search Results

As a blogger, I feel the impact of seo onpage is so great against my blog, proved only within 2 months of this blog article is already on page #1 Goggle although you can also calculate how many articles this blog has, maybe still a little and I rapidly Update articles as well. Worse yet I am also still weak in promoting my blog this days. But with article onpage optimization I can enter the line of Google page #1.

For this opportunity I will discuss onpage seo or optimization on the structure of your blog. If you are still a beginner and confused just follow the following seo onpage checklist and you're advised to do it one by one because this process must be once done on your blog.

1. Use an SEO-friendly template, or you can check on SEO - friendly blog template collection @KarlExpert.Com. If you are interested please download and install on your blog.

2. Or if you want to keep using your blog template then you should install dynamic heading on your blog and do not forget to install breadcrumbs and also post related article-related post.
Read Also : Ways on How to Edit Blogger Template For Friendly SEO - Blogspot SEO Tips

3. Make sure your template structure is correct ie article post is on the left and sidebar on the right.

4. Do not forget to create different title tags and meta descriptions on each page. To make it please read the article on How to Add Meta Description and Title For Your Blog Posts

5. Register your blog on Google and submit sitemap, read on How google webmaster list and install verification code on your blog.

6. Register your blog on Google Analytics and FeedBurner.

7. Make sure the images on the sidebar have ALT tags. And every image you post in the article must have alt tags.
Read Also : Preparation For SEO Before Starting A New Blog

8. Make sure to install the widget Popular Post, Blog archive and labels because it will help the spread of pagerank points when you do the Offpage optimization later.

9. We recommend that the widget label is stored under the header (see this blog).

10. Make sure not to install links in the sidebar to other blogs (link exchange), because it is to be a link leakage on your blog

11. At the end or footer make sure the link to the Home Page that contains your blog keywords. (See this blog). If you have completed all the above onpage seo optimization points then your blog is quite seo friendly in terms of onpage. All you have to do is to keep away from Installing unimportant widgets and do not forget to create a quality article to your blog preferably for Google. Hopefully useful and your blog is easily indexed by Google.


Read Also : How to Install & Setup WordPress SEO Plugin by Yoast - 7 Ways to Help You

Expert Lheeman

How to Make Google to Index Your New Blog& Website Quickly

How to Make Google to Index Your New Blog&Website Quickly
Read Also : Things You Need to do Principally When You Open New Blog and Ways on How to Increase Your Blog Visitors in 7 Simple Steps

How to Make Google to Index Your New Blog&Website Quickly.........Tips For Fast Google Articles/Posts Indexed - Google Rank Tips...........How to Get Fast Google Articles/Posts Indexed - Google Top 1 Tips


Tips for Google Fast Articles Indexed - In General after we make a post a new article we are not indexed directly by google. If your friends do not believe please check your own by typing (Keyword "site:your url") in the google search field, find out whether the article you just post whether it is indexed or not if no means your article has not been indexed.
Read Also : 4 Phases of Development For Cycle of a Blog and 3 Reason Why You Needs to be Writing a Good Genuine Contents For Your Blog Readers

How long does it take for new articles to be indexed by Google ??

Each article has a time to be indexed differently, the fastest one hour after the new post is created. Even there are also up to one week indexed blum.

Based on the above then we need to register or tell google that we have a new article by submitting our article. To register our new article follow the steps below.
Read Also : Ways on How to Compare Data Traffic in Google Analytics and 3 Free Ways on How to Bring Genuine Traffics to Your Website and Get it Continuously

Tips For Quick Google Indexed New Articles

1. Go to Google add url or click the Google Crawl URL to make it easier.

2. In the URL field enter your new article url.

3. Enter the CAPTCHA Code provided

4. Finally click Send Request >> Done

Type:
*. Your article will be indexed within two to five hours.

*. Do this step every time you create a new article for your articles to be quickly indexed.
Read Also : Affiliate Blog Case Study : Hosting , Blog Settings , and Content Strategies - Host Affiliative Website and How to Install & Setup WordPress SEO Plugin by Yoast - 7 Ways to Help You

In order for maximum results please submit sitemap and web url on google webmaster
Please read How to submit sitemap for blogspot

So, first about tips for fast articles indexed google, hopefully can help you and thanks for that you have stopped by to read this article.
Read Also : Preparation For SEO Before Starting A New Blog and Do not underestimate Share on Google Plus Blog Postings - Bloggers Advise


Expert Lheeman

Ways on How to Remove a Widget From Blogger Template

How to Remove a Widget From Blogger Template

How do i Delete a Non -Detachable Widget From Blogger Template ?? - Automatical Deletion or removal of Blogger Widget

Rtudy Also : Instruction For seo before starting A New Weblog and Four levels of improvement For Cycle of a Blog

The way to eliminate a Non wanted Widget out of your blogger template

Your blog displayment covered a super impact in increasing your blog visitors, if your weblog does not resembled a expert one then traffic may not be impressed to live longer as predicted on your blog.
Examine additionally : the way to Make cash from Youtube Videos : Monetization & AdSense and How to Install Alexa Rank Widget on blog to boom your web Rank
If you want to supply a an impressive view to your Blog you need to set up the blog Widget in respective space, in order that traffic can get right of entry to your blog without problems. For this at instances you need to cast off some widget or at times you have to encompass some widget to make it users friendly.
Examine also : New hints & tips listing for Google Webmaster tools and Biography, Contacts and All you need to understand about Facebook.com owner Profile - Mark Zuckerberg

This educational is best for those widget which appears to haven't any elimination option

Study the following hints sensitively

1) Go to Blogger and click on layout

2) Then select the Edit option from the widget you in reality wanna take away

3) After that you'll see a pop up window just like the following one
Blogger Blogspot Widget Removal Pop Up Window
Examine also : The way to sign up for Google Analytics and install Codes on blog and How to add a brand new blog/web site into Your Google Analytics
4) Reproduction the widget identity and go to Edit HTML.....Expand Widget template

5) Then press Ctrl+F and look for the widget identity

6) You need to seek until you get a code like the following one
<b:widget id='Widget ID' locked='false' title='Widget title' type='Blog'>Your widget code here</b:widget>
Examine also : A way to add Meta Description and Title In Blogspot Blogger Put Up and Approaches on a way to Edit Blogger Template For friendly seo - Blogspot seo hints

7) Delete the complete codes as it was given in No. 6

8) Then click "Save"

Are you having difficulties with this tutorial ?? - then you definitely contact me via Our About Web Page
Study also : A way to without problems set up Google AdSense advertisements in WordPress and Eight (8) positive approaches on the way to increase your weblog Pageviews


Expert Lheeman

How to Add Meta Description and Title In Blogspot Blogger Post

How to Add Meta Description and Title In Blogspot Blogger Post

MAKING AND INSTALLING META DESCRIPTION, TAG TITLE, AND TAG HEADING IN EVERY ARTICLE/POST OF YOUR BLOGGER BLOGSPOT

Read Also : Selecting Paid Domain for Niche Blogs : 5 Important Things You Should Know

Title Tag, Heading Tag and Meta description is one of the best seo tricks being used, therefore every article should have heading and title tags or different meta description for google to recognize each of your articles.
There are so many differences between the seo master on how or the application in this case, I will reveal this tutorial based on the results of research or trial.
Read Also : 6 Things You Should Know Before Buying A Blog and Ways on How to Become an Authority Blogger In Your Niche Skills

TITLE TAG Make sure your title tag is as below

To find out if your title tag is as above or you can not use the following steps

On your blog dashboard select TEMPLATE menu

Click the EDIT HTML button

A box will appear containing the code html
Read Also : Ways on How to Increase your Google AdSense Earnings and Still Keep it Rising and How to Enable Meta Tags for Search Descriptions - SEO Tips

Put your cursor in the box and find the code "title"

If difficulties tean Ctrl f on your keyboard.

If you have met please check the code between "title" and "/title" is the same as the title tag above.

If you have not deleted the code from, "title" to "/title" and replace the title tag code above.

Click save.
Read Also : How to Create a Favicon Blogspot Blog - Advancive Blogger Features and Preparation For SEO Before Starting A New Blog

Now that you have successfully installed the title tag then it remained.....

META DESCRIPTION Please follow the steps below to install meta decription for each of your articles.

Select the SETTINGS menu on your blog dashboard

Select the SEARCHING PREFERENCES setting
Read Also : Basic SEO Tips for Blogger Blogspot from Google - Blog Website Seo Trick and New Tricks& Tips List for Google Webmaster Tools

Enable the TAG META DESCRIPTIONS option

Put a description or brief description of your blog.

Save gratuity.

Click to zoom in. To make the most of it, when you create a new article in the menu on the right hand side you will have a search description menu, after you finish writing the article, labeling the article and specifying permalink forget to fill in the description of the searcher. Enter a short description of the article you created after that click finish. And publish your article.
Read Also : Why Earning Tab is Not Displaying on my Blogger Blog? and Basic SEO Tips for Blogger Blogspot from Google - Fast Google crawler for Blogspot

HEADING TAG For this tutorial is relatively easier because you just choose whether sub in your article title or subtitle. If it's a title then you just select HEADING if it's subtitle then just choose SUB HEADING.

Because adding Title Tag, Tag Heading, and Meta description is very easy then try every article you have with these three tutorial.
Read Also : The Best Host to be Making Money Through Blogging : WordPress or Blogspot ? and How To Create Free Blog At Blogspot and Start Making Money


Expert Lheeman

How to Add a New Blog/Site into Your Google Analytics

How to Add a New Blog/Site into Your Google Analytics

Ways on How to Add a New Blog/Site into Your Google Analytics

Read Also : 3 Free Ways on How to Bring Genuine Traffics to Your Website and Get it Continuously and 7 Suggested Ways to Know That Your Blog Needs Readership

How to Add a New Blog in Google Analytics

How to Add a New Blog in Google Analytics - Adding a New Blog to Google Analytics- Recently I got a comment from one of these Expert Lheeman blog visitors and asked how to add another blog to google analytics?

What does not mean? Feeling a bit uncomfortable yes in reading. I clarify again for example you have registered your first blog into Google Analytic, now you have a new blog and want to install analytics ID also how to do that?
Read Also : Ways on How to Increase your Google AdSense Earnings and Still Keep it Rising and 6 Things You Should Know Before Buying A Blog
That is more or less the intent of the title of this article.

Okay we just go on how to register your new blog to google analytics but before if you do not know how to register google analytics please read How to register google analytics and install the tracker code in your blog.

*. First go to Google Analytic and login using your account.

*. If you have please find ADMIN (See Figure)

*. Then look for ACCOUNT and click the small arrow below it.

*. After that select CREATE NEW ACCOUNT and follow the steps as of when you first register google analytics.
Read Also : Easy Ways to Make Your Blog Google Analytics reports in PDF Forms and Ways on How to Compare Data Traffic in Google Analytics

What should be remembered is that when you install Google Analytics tracker code in your blog may be a bit difficult, please use the code I have given in post on How to list Google analytics

That's all I can explain about how to add a new blog to Google analytics, as usual if there is a problem please comment below.
Hopefully useful and greeting passionate Bloggers
Read Also : How to Install Google Analytics by Using Google Analytics Plugin and How to Install Google Analytics on WordPress Blog Using WP Theme


Expert Lheeman

How To Create Free Blog At Blogspot and Start Making Money

How To Create Free Blog At Blogspot and Start Making Money

How To Create A Free Blogger Blog At Blogspot and Start Making Money From The Blog Without Being Stressed


How to Make Blogger Blog free on Blogspot - The more days the number of bloggers increases and more and more who want to have their own blog, based on it which makes Expert Lheeman to take the initiative to provide a tutorial on how to create a free blog by utilizing a free blog service provider that is blogger/blogspot. Com.
Read Also : How to Make Money from Blog Without Google AdSense - Other Ads Available and Things You Need to do Principally When You Open New Blog

The reason to choose blogspot or blogger.com is because of easy way of operation especially for beginners. Here are some reasons why I suggest to choose blogspot.
*. The operation is easy
Read Also : How to Make Money from Youtube Videos: Monetization & AdSense and 4 Phases of Development For Cycle of a Blog

*. Owned by Google so easily get a place or easily indexed in google.

*. Blog templates are easy and free. After knowing some advantages blogspot let us now turn to how to make it, please follow the step-by-step below.

How to create a free and easy blog

Read Also : How to Make Money from Blogs - Not Just Google AdSense : Make Money Online and Sure 7 Ways to Make Money from Blog - Online Business Through Blogging
*. Set up google email. If you do not have an email please read How to create a gmail email on google by Karlexpert.com

*. Go to Blogspot.com.

*. Click on SIGN UP or LIST on the top corner of your screen.

Select List - Sign UP

*. Select the profile you want to use if BLOGGER PROFILE or G+ PROFILE

*. After selecting PROFILE please click CONTINUE TO BLOGGER

*. Next thing is to Click NEW BLOG

*. Will receive pop-up please fill according to your wishes.

*. Click CREATE BLOG

*. Then your blog has been successfully created and please click START BLOG to write.
Read Also : Basic SEO Tips for Blogger Blogspot from Google - Blog Website Seo Trick and Preparation For SEO Before Starting A New Blog

*. Done Now that you have your own blog and you can change blog template to your liking I suggest looking for a seo-friendly template or you can see my seo-friendly collection of templates. In addition there can also manage your blog in such a way that your blog is famous and wait for 6 months before applying for Google Adsense.

I think this is enough on how to create a free blogger blog on blogspot hopefully can help you who are looking for references to create a blog.
Read Also : Basic SEO Tips for Blogger Blogspot from Google - Fast Google crawler for Blogspot and The Best Host to be Making Money Through Blogging : WordPress or Blogspot ?


Expert Lheeman

How to Sign Up for Google Analytics and Install Codes on Blog

How to Sign Up for Google Analytics and Install Codes on Blog

How do i Sign Up for Google Analytics and Install the confimation Codes on My Blog ??

Read Also : Ways on How to Increase your Google AdSense Earnings and Still Keep it Rising

How to Sign Up for Google Analytics and Install Codes on Blogs

How to Apply for Google Analytics and Install Codes on Blog- Do you want to know your blog traffic? Or want to know how busy your blog is? Google Analytics is the right application to monitor your blog, especially google analytics is also very important for the online business and money seekers on the internet because through this google application we can find out how busy our blog is.
Read Also : Easy Ways to Make Your Blog Google Analytics reports in PDF Forms

We just go to the tutorial on how to register google analytics and install your blog code.

How to Sign up for Google Analytics Universal

*. Visit the Google Analiytics Page

*. Once on the google analytics page, click the ENTER link in the top right.

*. Click REGISTRATION to create a new analytics account.

*. Once you have entered complete registration form then..
*. Make sure the option you choose is WEBSITE not APPLICATION

*. Slide down the bottom you will choose the option from google analytics and make sure to select the UNIVERSAL ANALYTICS because the feature is complete and the same free.
Read Also : Ways on How to Compare Data Traffic in Google Analytics

*. Next click agree on PRIVACY POLICY

*. After you click AGREE, you will be taken deep in your account, and there will be an analytics code that you have to install on your blog.

*. Please copy the
Installation code by Google analytics Tracking ID and paste it on your blog

*. Log into your blogger account

*. Select TEMPLATE menu

*. Select EDIT TEMPLATE

*. Find the codeon your blog and paste the analytics code on the template

*. Save Changes

*. Try re-opening the google analytic page and press F5 and see if there are any successful TRACK CODE notifications.

*. If not Try the following alternatives

Read Also : How to Install Google Analytics by Using Google Analytics Plugin
*. Replace UA-XXXXX-X code with your tracking ID.

*. Remove the code above that you previously installed and replace with the script code above.

*. SAVE TEMPLATE

*. Try pressing F5 back on google analytics page .. hopefully successful

Actually you can also install the tracking ID through settings and select other on google analytics column input your TROUBLES code (UA-XXXXX-X).

With the installation of tracking id on your blog then you can know your blog traffic and its mare is more SEO. So how to make google analytics list and install the code on your blog is finished, OK I think enough until here first time already stop by and read my article.
Read Also : How to Install Google Analytics on WordPress Blog Using WP Theme


Expert Lheeman

The Best& Successful Google AdSense Ad Units Increase Earnings

The Best& Successful Google AdSense Ad Units Increase Earnings

The Best & Successful Google AdSense Ad Units that Increase Earnings


Read Also : Ways on How to Increase your Google AdSense Earnings and Still Keep it Rising

The Best Google AdSense Ads Unit - The Best & Successful Google AdSense Ads to Increase this Income by Google itself, in AdSense Help: Optimization Tips.

Many other posts about the best AdSense ads, the most potent to generate dollars, how to increase AdSense earnings, the causes of decreased revenue, and so forth. Can we absorb and apply, especially if based on experience.
Read Also : How to Display Both Text and Image Ads for Google AdSense

However, of course the following guidelines from Google are most trusted because of the "primary source" directly.

"As a simple reference, large ad sizes tend to increase AdSense earnings better than ads that are elongated because it is easier to read," Google said this in the beginning of its guidance.

Mentioned, there are five ad sizes that are considered most effective. If placed correctly, the width of ad size can significantly increase AdSense earnings.

The five best & most successful Google AdSense Ad Units Increase this Income are as follows:

1. Large Box 336x280

2. 300x250 medium grid

3. 728x90 Leaderboard

4. Half a page 300x600

5. On mobile, 320x100 Great Mobile Banner.

Of course, the five sizes are customized also with the template design you use. Do not forget the Limit on the number of AdSense Ad Units you can Install.

However, we are reminded, although some of these ad sizes typically perform well (increasing AdSense earnings), but we recommend using sizes that are aligned with your page.

We can see a guide to Google AdSense ad sizes. "It would be better if you add one suggested ad unit instead of adding two smaller ad units side by side," Google says ending its guidelines.

This is an explanation about the Best & Successful Google AdSense Ad Units, also from Google.

Just a quick review of the Google AdSense Ad Units Best & Successful Income Increase. Post Expertlheeman simply keeps documentation and shares with you who do not know yet.

Read Also : How To Easily Install Google AdSense Ads in WordPress

Expert Lheeman

Easy Ways on How to Optimize WordPress Database WP-Optimize

Easy Ways on How to Optimize WordPress Database WP-Optimize

WordPress blog databases should be optimized to eliminate nonessential data (eg repeated postings and automatic drafts) so the database size does not swell and blog access speeds are not compromised.

You can do this optimization in php MyAdmin hosting used. However, this way is quite complicated, especially for those who not abene not understand technical hosting.

The easy alternative is to use the WP-Optimize plugin. This free Ruhani Rabin free plugin lets you perform database optimization with one click on your blog.

Here's how to optimize WordPress database using the plugin.

A. Installing and Enabling WP-Optimize

The first step is to install and enable Wp-Optimize. For that purpose, follow the steps below.

1. Log into your self-hosted WordPress blog using your username and password.

2. Once on the Dashboard, point your computer mouse over the Plugins feature, then click Add New.

3. In the plugin search box on the page that appears, type WP-Optimize.

4. In the short description of WP-Optimize that appears, click Install Now

5. Click Activate Plugin to enable WP-Optimize.

B. Database Optimization

WP-Optimize is active, right? Now it's time to use the plugin to optimize your WordPress blog database. How below.

6. Click the WP-Optimize feature

7. On the Optimizer page that appears, you will see the Clean-up options and Actions section. In the Clean-up options, select the options that are in accordance with the condition of your blog. In Actions, select Optimize database tables. After that, click the Process button.

8. You will see a notification about database optimization (including deletion of spam comments that escaped Akismet).

C. Optimization Time

How often should optimization be done? There are no rules. Personally, I do database optimization after publishing posts.

For example, if I publish one post a week on my blog, then the database optimization is done once a week.

As you can see, WordPress database optimization is very easy by using WP-Optimize. Therefore, if you have a self-hosted WordPress blog, it would not hurt you to try WP-Optimize to keep your blog database healthy. Good luck!


Expert Lheeman

What Is WordPress Blog Database ?

What Is WordPress Blog Database ?

I often move from one blog to another hosting hosting. One of the removal process is to download the database from the old hosting and uploading them to a new hosting.

Honestly, I do not pay attention to the WordPress blog database. However, when a friend asked me about what the WordPress database is, I stammered answer.

After researching and reading a variety of references, it turns WordPress blog database consists of 11 tables of data.
Here's a brief explanation of the eleventh table data.

1. wp_commentmeta

This data table hung meta information about the comments that appear on your WordPress blog. This meta information consists of four areas, namely meta_id, comment_id, meta_key, and meta_value. One example is the comment meta information such as status comment is approved, pending, and trash.

2. wp_comments

As the name suggests, this data table associated with the facility comment. It consists of the name of the comment, URL, email, and text commentary.

3. wp_links

Wp_links store information related to the incoming link in the Links feature. The example is:

*. Administration> Links> Add New

*. Administration> Links> Links

4. wp_options

Wp_options associated with the adjustment (setting) of your blog. The data table consists of the General, Writing, Reading, Discussion, Privacy, Permalinks, and Widgets. In addition, this data table is also used to store plug-in settings.

5. wp_postmeta

Wp_postmeta associated with meta information about the posts, pages, and custom post types. One example is the template for creating a post or page.

Some plugins used to store data wp_post meta plugin. An example is the SEO information on SEO plugin like All in One SEO Pack and SEO by Yoast.

6. wp_posts

These data tables related to WordPress blog content.
Consisting of all posts, pages, and revision.

7. wp_terms

WordPress has a taxonomy system that allows you to organize your content. Items that exists in this taxonomy called the terms and kept in wp_terms.

For example, categories and tags posting a taxonomy. The names of the existing categories and tags are terms.

8. wp_term_relationships

This data table serves to manage the relationship type and term posts. In other words, this data table helps WordPress determine post X in the category of Y. For example, postings in the category SEO on Page SEO.

9. wp_term_taxonomy

This data table defining the taxonomy in wp_terms. For example, if you have a WordPress Tutorial term, then this data table comprises data related to taxonomy category.

In short, wp_term_taxonomy help WordPress distinguish whether these terms of categories or tags.

10. wp_usermeta

This data table meta information of Book Store Users in WordPress blog. Users here include administrators, contributors, and so on.

11. wp_users

Users of this table contains information such as username, password, and user e-mail name.

WordPress blog database is complicated because it is associated with the programming language. Nevertheless, knowing the eleventh data table above, I understand what it's little database WordPress blog. How about you?

Info: In the next post I will inform you how to easily optimize your WordPress blog database.


Expert Lheeman

How to Activate Akismet Plugin for WordPress Blog in a Simple Ways

How to Activate Akismet Plugin for WordPress Blog in a Simple Ways
Steps on How to Activate Akismet Plugin for WordPress Blog in a Simple Ways to Stop Spam Comments

Akismet is effectively used to ward off spam comments in a self-hosted WordPress blog which comments section is not closed or is not removed. Unfortunately, after installing Akismet, a lot of bloggers who can not activate it because it is constrained API Key.

If you are one of them, do not worry. Akismet activate it easily. The following step by step you need to do.

A. Obtain API Key

To activate Akismet, you need API key, is not it? API key is composed of free and paid version. Of the two versions, you can simply use the free version of the API key. To get it, do the following steps.

1. In the description of the Akismet plugin you have installed, right-click to Sign up for Akismet plan.

2. In the Akismet site that appears, click the button GET AN Akismet API KEY.

3. You will see a page Signing up for Akismet with WordPress.com. Enter your email address and create a username and password on registration of the three boxes provided. After that, click the Sign up button.

4. You will see four Akismet Plan. Of the plan number, select Basic and press the button GET STARTED.

5. You will see a page that one of its parts is a Payment Method. Ignore the part, and focus to the Akismet Basic. Swipe left black button that contains the $ 36.00/YEAR thus be $ 0.00/YEAR.

6. Payment Method section will be changed to the Contact Info. Type in your first and last name in the two boxes provided (you are free to use any name).
After that, click the Continue button.

7. You will see a notification of your registration complete success with API Key.

8. Copy the API key.

B. Enable Akismet

After getting the API key, the next step is to enable Akismet.
Therefore, perform the steps below.

9. Go back to your blog. In the Akismet plugin, click the Settings link.

10. Paste box API Key Manually enter an API key. After that, click the button Use this key.

11. You will see a notification that Akistmet active.

As you can see, it is not difficult to activate Akismet. Try one step above to enable Akismet on your WordPress blog so the blog is free from the invasion of comment spam. Good luck!


Expert Lheeman

How to Create Horizontal Lines in the post or page on WordPress

How to Create Horizontal Lines in the post or page on WordPress
Guidelines on How to Create Horizontal Lines in the post or page on WordPress Host

One of the interesting things when released ebook on How to Write Posts Qualified is by adding a horizontal line on the Testimonials page sales (sales letter) the ebook. With the horizontal lines, each with a clear testimony of making it more attractive.

Believe it or not, even though I've been using WordPress since 2015 on my music niche site, I learned how to create a horizontal line when I made the sales letter. It was by chance, without searching on Google or read totorial on other people's blogs.

Regardless, if you want to make a line like that in the post (Post) or page (Page) on your WordPress blog, here stage by stage.

1. Create Post - new Page (see How to Create a Page). If you've made it, edit the Post - Page.

2. Navigate to the text you want by horizontal lines. After that, place your cursor at the end of the text.

3. Click the Horizontal Line icon.

4. The horizontal line will appear below the text.

5. Repeat steps 2 and 3 for other text that was about to be given a horizontal line.

6. Publish or update Post/Page.

7. See the results by going to the Post/Page.

The horizontal line is useful for separating or clarifying certain parts of the posts or pages of your WordPress blog. Try one step above if you want to use a line like that. Good luck!


Expert Lheeman