8 Sure Ways on How to Increase your Blog Pageviews

Sure Ways on How to Increase your Blog Pageviews

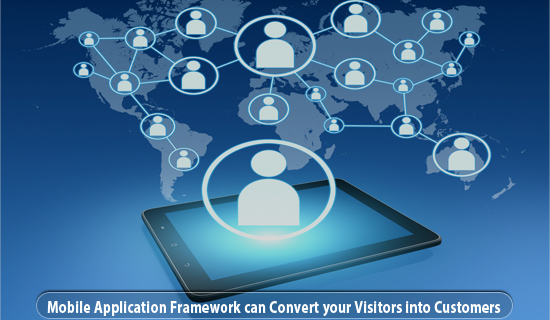
8 Sure Ways on How to Increase your Blog Pageviews to Derive Large Engulfed Traffics


How to improve, boost, or to increase pageviews and visitors-blog readers (SEO Tips).

PAGEVIEWS is the number of pages (posts) that are opened-read by visitors of our blog. It could be a little visitors, but pageviews him a lot because that little "feel at home" to open our blog.

Pageviews stats can be viewed in the "Stats" menu in the blog dashboard, also in Google Analytic. If pageviews is a bit, should be the motivation to raise it. If pageviews is a lot, also should be an encouragement to continue to improve it by posting repentitive and SEO optimization blog.

8 Ways to Increase Blog Pageviews


Many bloggers who share about How to Increase Pageviews Blog, one of them Shout Me Loud. There are at least eight tips or methods to improve blog's pageviews, plus additional information from Expertlheeman based on experience.

1. Make an Interesting Post Title!


Interesting titles that if interested in the reader, but still contains important keywords are targeted. Not a "weird" title, let alone excluding keywords.

For example, the most popular Blog Expertlheeman post is still around Blog Gist. The keywords "cool blog templates and seo" apparently still an attraction. Remember! Your post must be original! Homemade, let alone Google Panda 4.0 has been updated which prioritizes quality posts and original.

2. Posting Related Posts Widget


Show list of related posts below posts. Minimal 5 posts, maximum 10, not most, so make it later! Who has not got any related post, please do: How to Install Related Posts Securely from Link Inserts is in this blog.

3. Link your posts with other posts.

Make an "internal link", a link to another post related to the topic discussed.
While creating a new post always think about relating it to other posts present on your blog. So if you have linked a post with other post effectively then it will also help you in increasing your blog's pageviews.

4. Show "Recommended Contents".


If necessary, display 2 to 3 post titles you recommend. It usually appears at the bottom left of the user's monitor screen. For example, seconds. Always bring it up.

Expertlheeman himself did not do it because for the Expertlheeman it was "annoying". Cause headache. But just try to install it. Anyway, a related post list is also sufficient. That is, this 4 points can be passed because it is equal to 3 points on How to Increase Blog Pageviews.

5. Show "Recent Post" and "Popular Posts"


It's also the same as points 3 and 4, but the list of post titles is a lot different because it displays the latest posts and most reads.

1. Widget popular post already provided blogger. Just click "Layout"> "Add Gadget"> select "Popular Posts".

2. Install "latest post" live "Layout"> "Add Gadget"> select "Feeds", then enter the URL of your blog address. Click Enter and please setting.

6. Install Search Box (Site Search tool)


This is mandatory! For example, look in the sidebar of this blog. This facility allows users to search for the posts they need.

7. Make a Table of Contents (Sitemap).


Many bloggers do not recommend, because it's rare that there are open, but who knows a lot. Put it up. The contents of the blog can help users find the info they need. Examples and how to create a list of blog contents, click on the "About" menu of this blog.

8. Always Reply on Comments!


Comments reply, answer, comments that go to your blog!
Users will be happy if their comments are replied, and can re-open your blog because they feel "to be new friends". Is it right...?

Well, that's 8 Ways to Raise Bloggers Blog Pageviews version, plus "interpretation" from Expertlheeman. How is your version?


Expert Lheeman

How to Enable Meta Tags for Search Descriptions - SEO Tips

How to Enable Meta Tags for Search Descriptions - SEO Tips

How to Enable Meta Tags for Search Descriptions in Blogger Blogspot - Categorised as part of SEO Tips


To add SEO blog posts, also blogs secra overall, we must create or fill in Meta Tag Description in Blogger Dashboard.
Blogger provides "Search Description" in the right sidebar as we write posts. We can fill it with the title, the first paragraph, or the keywords that internet users are looking for.

The "Search Description" menu will be visible after we enable it in Settings in the blog dashboard. We can use it when we create a post to provide a description of each post that we make.

Here's how to enable blog meta tags while enabling search descriptions in each post.

1. Click "Settings"> select Search preferences. If the menu "Description" is still [Disabled], it means that our blog has not enabled Search Reference.

2. Click "Edit".

3. Click "Yes" and enter a description of your blog, which is a description of the content of the blog as a whole.

Here you describe what is shared on your blog, such as "Blogs on social media and online business".

This description will be the meta description of the front page. Maximum 150 characters.

4. How to fill in the description meta tag.

Now not only your blog already has meta tags of the front page, but activate menu "Search Description and do right sidebar when writing post.

Make sure you fill it before click "Publish". Do not be too short, nor too long. Mediocre. The important thing contains keywords that are relevant to the contents of the article and if sought by visitors or internet users.

Similarly how to Enable Meta Tags for Search Description as part of SEO Blog Tips.


Expert Lheeman

Online Spam Comments Bots Detector and How to Stop it by Yourself

Online Spam Comments Bots Detector and How to Stop it by Yourself

Online Spam Comments Bots Detector and How to Stop it by Yourself - Put a full stop to Spam Comments by activating spam bots detector


BLOG is popular and many visitors are definitely attacked comments Spam Online Shop Comments, Online Gambling, online betting, or other types of spammy comments.

Spam comments from regular bloggers (not online stores) also often exist, especially from "blogger newbie" who implements the teachings "blogwalking" wrongly ().

Almost every day the Expertlheeman blog was attacked by Spam Comment. In fact, almost all of the demo blogs of the Expertlheeman Collection are also subject to spam comment attacks.

Would you like to publish such comments? Besides irrelevant to post topics, it is also very clear it's a free promotion mode and expect backlinks.

Expertlheeman has also shared about Spam Commentary Examples that Litter the Blog.

Expertlheeman actually salute to bloggers online stores who diligently commented like that (spread spam). Tireless, never give up, keep trying. It's the key to business success by experts.

Understanding Comment Spam - Comment Spam is a comment that looks like an ad or a random link to an unrelated site.
So says Google in How to Prevent Spam Comments.

"If you've ever received a comment that looks like an ad or a random link to an unrelated site, then you've received a comment spam," he explained.

In a way, spam comments mean unexpected comments, the content of comments is not related to the content of the post, and is not intended to respond to or discuss blog posts.

The purpose of spam comments is to leave "traces" or links (backlinks) as well as free promotion!

Google says, spam comments are harmful to our blogs, as well as to its spammers.
Spam comments damage the reputation of the site, as well as damage the reputation of an online blog shop that often chips.

"Comments are a great way for webmasters to build communities and readers," Google said.

"Unfortunately, comments are often abused by spammers and irresponsible people, many of whom use scripts or other software to create and post spam."

How to Resolve Spam Comments We must protect our blog from this type of malicious spam. Here are some ways to reduce or prevent comment spam comments:

1. Do not allow anonymous comments.


Anonymous commentator is a comment writer who does not want to name or identity.
However, the risk is that readers who are not logged in to a Gmail or Blogger account can not comment. So you can ignore no. 1, as long as the second and third ways are applied below.

2. Enable comment moderation.


This is the most effective way. As soon as spam comments appear to be spam, delete directly! Make your blog dashboard commentary settings to be pending before published
From your blogger dashboard

*. Click "Settings"

*. Click "Post and comments"

*. In the Comments section, select "Embeded" (Embed), "Anyone", and "Always"

*. Save!

3. Install the Spam Anti-Comment Code.


Sometimes there are also good comments, such as not spam, but the ends insert active links as well! Yes, spammer is also his name.

We can publish the contents of a good comment or connect with the posting, but the link live (live link) or active link (the link) we turn it off.

How?

Place the following code above the code in your blog template. You can change the words in the highlights - with your version of the sentence.


Similarly reviews about Spam Online Shop Comments and How to fix it.

Expert Lheeman

The Best& Successful Google AdSense Ad Units Increase Earnings

The Best& Successful Google AdSense Ad Units Increase Earnings

The Best & Successful Google AdSense Ad Units that Increase Earnings


Read Also : Ways on How to Increase your Google AdSense Earnings and Still Keep it Rising

The Best Google AdSense Ads Unit - The Best & Successful Google AdSense Ads to Increase this Income by Google itself, in AdSense Help: Optimization Tips.

Many other posts about the best AdSense ads, the most potent to generate dollars, how to increase AdSense earnings, the causes of decreased revenue, and so forth. Can we absorb and apply, especially if based on experience.
Read Also : How to Display Both Text and Image Ads for Google AdSense

However, of course the following guidelines from Google are most trusted because of the "primary source" directly.

"As a simple reference, large ad sizes tend to increase AdSense earnings better than ads that are elongated because it is easier to read," Google said this in the beginning of its guidance.

Mentioned, there are five ad sizes that are considered most effective. If placed correctly, the width of ad size can significantly increase AdSense earnings.

The five best & most successful Google AdSense Ad Units Increase this Income are as follows:

1. Large Box 336x280

2. 300x250 medium grid

3. 728x90 Leaderboard

4. Half a page 300x600

5. On mobile, 320x100 Great Mobile Banner.

Of course, the five sizes are customized also with the template design you use. Do not forget the Limit on the number of AdSense Ad Units you can Install.

However, we are reminded, although some of these ad sizes typically perform well (increasing AdSense earnings), but we recommend using sizes that are aligned with your page.

We can see a guide to Google AdSense ad sizes. "It would be better if you add one suggested ad unit instead of adding two smaller ad units side by side," Google says ending its guidelines.

This is an explanation about the Best & Successful Google AdSense Ad Units, also from Google.

Just a quick review of the Google AdSense Ad Units Best & Successful Income Increase. Post Expertlheeman simply keeps documentation and shares with you who do not know yet.

Read Also : How To Easily Install Google AdSense Ads in WordPress

Expert Lheeman

How to Add Alexa Rank Widget on Blog to Increase your Web Rank

How to Add Alexa Rank Widget on Blog to Increase your Web Rank

How to Add Alexa Rank Widget on Blog to Increase your Web Rank and your Traffic also


Alexa is the best site to check your web rank, because it has a very good feature in the matter of rank checking.

How to install widgets basically the same as as usual, what we need to install is widget for alexa and it depends on blog owner, install widget alexa, visitor can see rank from us no longer need to check through alexa website

I think personally is a website providing information about the rankings on the website, the ability of informing the rank of a good website because alexa has features capable of reading the developments of the website in the rank ratings. The better the rank of the blog will be a benchmark that a lot more people visited

The latest way to install widgets.

1. The first thing to install must already be in the blogger account

2. Press the layout button on the blog page layout appears

3. Press the add gadget button, page load add gadget

4. Select HTML/javaScript

Copy the code below to the template


Remember to replace this blog url back to yours as it was just an illustration


Expert Lheeman

The latest way of Alexa Rank Listing is Free

The latest way of Alexa Rank Listing is Free

The latest way of Alexa Rank Listing is Free


This is the latest way to register alexa rankings for free for blogs or sites, a website admins expect to have a good rank, maybe this is the extent to which the development of blogs. And definitely want also blgo get organic traffic from Google.

How to list in Rank alexa for free


1. Visit page www.alexa.com/siteowners/claim

2. Enter URL and press Continue button

3. Will appear Select a method page please select Method 2 Add an Alexa Verification ID to your homepage, the verification page appears under method 2 which we button and method 2 is for free claim.

4. After select method 2 appears meta code in copy in template do copy me take in template blog and in continue with save template, after that go back to alexa rank site and press button Verify my ID.

5. Please choose how to register through facebook or use email, because there are two options given by alexa rank to register

6. Please fill in all contact info like

Site owner:
Address:
City:
Province:
Country:

After all filled press the save button

Because we do register for free will be quickly accepted, so be patient just the most important friend always post

Note: Please follow all the ways above will be fast can Rank Alexa, and additionally do update the article if it is doing alexa rank registration, attach the toolbar in 2 weeks will be able to rank alexa for blog or website, when writing this article alexa rank my blog This is not there, because this blog is not my initial update article hopefully fast alexa rank for always be patient and always the spirit and enjoy in writing articles
Update April 2017

Claiming of rank alexa is not free anymore.


Expert Lheeman

4 Powerful Ways on How to Turn New Visitors into Loyal Visitors

Powerful Ways on How to Turn New Visitors into Loyal Visitors

4 Powerful Ways on How to Turn New Visitors into Loyal Visitors


If you want to earn more money from your blog, you need loyal visitors. By having loyal visitors, you should not bother looking for visitors because loyal visitors will return to your blog voluntarily.

In addition, loyal visitors will buy the products or services you offer. Not only that, they will also gladly reference your blog through their social media or blog so that your brand is exposed for free.

I believe your blog now has new visitors. Regardless of the amount, your job is to turn them into loyal visitors.

If you do not know how, do not be discouraged. Here are 4 powerful ways to turn your new visitors into loyal visitors.

1. Give solution

This way you might think wisely. However, this method proved to be effective. Do not believe? Try to remember when you visited someone else's blog for the first time and then you like the blog because you find posts that solve one or more of your problems.

It is not too difficult to provide solutions for your new visitors. You can start by identifying the problems that the blog visitors have had and then creating the problem-based posting.

For example, your blog about tips on losing weight. Your target readers are busy women. So, the problem your target readers have can be:

*. Do not have time to exercise

*. Inconsistent diet

*. Difficult to prepare a healthy diet

*. Do not have money to exercise in the gym (gym)

From the 4 problems above, you can create a post with a title like this:

*. Do not Have the Time to Exercise? Try These 3 Easy Ways

*. 7 Simple Tips For You To Be Consistent Dieting

*. How To Easily Prepare Healthy Food Menu Everyday

*. 5 Activities That Will Keep You Fit Without Having to Go to the Gym

2. Share the new knowledge you have


Do you have new knowledge related to your blog topic? Share the new knowledge on your blog.

Ah, I'm not sure my blog visitors will like it. My knowledge is so trivial that visitors may have got it on someone else's blog.

If you have the above assumptions, it's natural. In fact, assumptions are not always true, in fact, often an obstacle. So you have to test it by writing it based on the new knowledge.

I often share my new knowledge. Examples below:

*. How to Use HabitBull to Track Your New Habits

*. How to Add a Logo in Child Theme Genesis

*. How to Clip an Article with Evernote

*. 9 Questions in English (8W 1H)

3. Show your achievements


The first time I visited Pat Flynn's blog (SmartPassiveIncome.Com), I was struck by her achievement of her monthly income of 6 digits dollars. Since then, I have been a loyal visitor to Pat Flynn.

What I learned from the above experience is that the attainment of blog owners will attract the attention of new visitors. So show me your achievements.

If your topic is about making money, show your blog earnings. No matter how big, write in the form of posts without shy. Do not be afraid of being called a narcissist or a snob. That is not important.

Of course, achievement is not just in the form of income. It could be something else.
In the example of weight loss tips above, you may be able to lose 5 pounds in 90 days. Write down the steps you take to achieve this and publish it on your blog.

4. Create a case study


New visitors, especially beginners, usually want to see real examples. This desire can be exploited by making case studies.
Believe it or not, make case studies easy. You just write down what you do, the progress, and the results.
At Expertlheeman, I have made a case study. You can read it at: Case study of Indonesian language blog authority


Expert Lheeman

How to Remove Inactive Customers in GetResponse

How to Remove Inactive  Customers in GetResponse

Ways on How to Remove Inactive Customers in GetResponse


Speaking of list building, the more customers the better? Not always. Why?

Because many customers may be inactive, those customers who never read any of your emails, whether it be autoresponders or newsletters (broadcasts).

The solution? You must remove them from your subscriber list.

For example, I removed more than 5,400 inactive Expertlheeman customers. If not deleted, I should pay $ 149 per month on GetResponse for 14,000 more subscribers.

Of course, how to remove inactive subscribers depends on which email marketing software is used. If you use GetResponse, here are the steps you need to take.

1. Log in to your GetResponse account.

2. In the Contacts feature, select Search Contacts.

3. Click Advanced search.

4. Select Campaign, Autoresponder sequence, and Subscription date. After that, click Add Condition.

5. In the Add condition section that appears, select Message not opened, all, and Never. After that, select all on Match.

6. Click Show Contacts.

7. You will see a list of inactive subscribers. In this example, customer names are partially covered for privacy.

8. Look at the bottom right of the list. At Show rows, choose the amount you want. For example, I selected 250 for 174 inactive subscribers to be visible.

9. Return to the top left of the customer list, then select Choose All.

10. Scroll your computer screen down. In the Actions section, select Remove from account to delete all selected inactive subscribers from your GetResponse account.

11. Click OK on the notification that appears.

12. After a while, you'll see that the selected inactive subscriber has been deleted.

Inactive customers are customers that are not valuable to your business. Therefore, you should remove them regularly (for example 2 months) so that your customer number becomes more "healthier". To remove it, try the steps above if you are using GetResponse.


Expert Lheeman

Easy Ways on How to Optimize WordPress Database WP-Optimize

Easy Ways on How to Optimize WordPress Database WP-Optimize

WordPress blog databases should be optimized to eliminate nonessential data (eg repeated postings and automatic drafts) so the database size does not swell and blog access speeds are not compromised.

You can do this optimization in php MyAdmin hosting used. However, this way is quite complicated, especially for those who not abene not understand technical hosting.

The easy alternative is to use the WP-Optimize plugin. This free Ruhani Rabin free plugin lets you perform database optimization with one click on your blog.

Here's how to optimize WordPress database using the plugin.

A. Installing and Enabling WP-Optimize

The first step is to install and enable Wp-Optimize. For that purpose, follow the steps below.

1. Log into your self-hosted WordPress blog using your username and password.

2. Once on the Dashboard, point your computer mouse over the Plugins feature, then click Add New.

3. In the plugin search box on the page that appears, type WP-Optimize.

4. In the short description of WP-Optimize that appears, click Install Now

5. Click Activate Plugin to enable WP-Optimize.

B. Database Optimization

WP-Optimize is active, right? Now it's time to use the plugin to optimize your WordPress blog database. How below.

6. Click the WP-Optimize feature

7. On the Optimizer page that appears, you will see the Clean-up options and Actions section. In the Clean-up options, select the options that are in accordance with the condition of your blog. In Actions, select Optimize database tables. After that, click the Process button.

8. You will see a notification about database optimization (including deletion of spam comments that escaped Akismet).

C. Optimization Time

How often should optimization be done? There are no rules. Personally, I do database optimization after publishing posts.

For example, if I publish one post a week on my blog, then the database optimization is done once a week.

As you can see, WordPress database optimization is very easy by using WP-Optimize. Therefore, if you have a self-hosted WordPress blog, it would not hurt you to try WP-Optimize to keep your blog database healthy. Good luck!


Expert Lheeman

What Is WordPress Blog Database ?

What Is WordPress Blog Database ?

I often move from one blog to another hosting hosting. One of the removal process is to download the database from the old hosting and uploading them to a new hosting.

Honestly, I do not pay attention to the WordPress blog database. However, when a friend asked me about what the WordPress database is, I stammered answer.

After researching and reading a variety of references, it turns WordPress blog database consists of 11 tables of data.
Here's a brief explanation of the eleventh table data.

1. wp_commentmeta

This data table hung meta information about the comments that appear on your WordPress blog. This meta information consists of four areas, namely meta_id, comment_id, meta_key, and meta_value. One example is the comment meta information such as status comment is approved, pending, and trash.

2. wp_comments

As the name suggests, this data table associated with the facility comment. It consists of the name of the comment, URL, email, and text commentary.

3. wp_links

Wp_links store information related to the incoming link in the Links feature. The example is:

*. Administration> Links> Add New

*. Administration> Links> Links

4. wp_options

Wp_options associated with the adjustment (setting) of your blog. The data table consists of the General, Writing, Reading, Discussion, Privacy, Permalinks, and Widgets. In addition, this data table is also used to store plug-in settings.

5. wp_postmeta

Wp_postmeta associated with meta information about the posts, pages, and custom post types. One example is the template for creating a post or page.

Some plugins used to store data wp_post meta plugin. An example is the SEO information on SEO plugin like All in One SEO Pack and SEO by Yoast.

6. wp_posts

These data tables related to WordPress blog content.
Consisting of all posts, pages, and revision.

7. wp_terms

WordPress has a taxonomy system that allows you to organize your content. Items that exists in this taxonomy called the terms and kept in wp_terms.

For example, categories and tags posting a taxonomy. The names of the existing categories and tags are terms.

8. wp_term_relationships

This data table serves to manage the relationship type and term posts. In other words, this data table helps WordPress determine post X in the category of Y. For example, postings in the category SEO on Page SEO.

9. wp_term_taxonomy

This data table defining the taxonomy in wp_terms. For example, if you have a WordPress Tutorial term, then this data table comprises data related to taxonomy category.

In short, wp_term_taxonomy help WordPress distinguish whether these terms of categories or tags.

10. wp_usermeta

This data table meta information of Book Store Users in WordPress blog. Users here include administrators, contributors, and so on.

11. wp_users

Users of this table contains information such as username, password, and user e-mail name.

WordPress blog database is complicated because it is associated with the programming language. Nevertheless, knowing the eleventh data table above, I understand what it's little database WordPress blog. How about you?

Info: In the next post I will inform you how to easily optimize your WordPress blog database.


Expert Lheeman

3 Simple Ways on How to Find Long Tail Keywords in Indonesian

3 Simple Ways on How to Find Long Tail Keywords in Indonesian

In the previous post I explore what the long tail keywords (LTK) is and it's benefits. In this post I will explain how to find the LTK.

Berbi ways on LTK, LTK speaking of course there are foreign and Indonesian. I will limit the discussion to the Indonesian language LTK just as I think most of you manage an Indonesian blog. To find LTK in Indonesian, following 3 easy ways that you can try.

1. View keywords in GAKP - (Ways on How to Use Google AdWords Keyword Planner)

The first way is to look for keywords on Google AdWords Keyword Planner (GAKP). GAKP is Google's free tool that presents ideas complete keywords with average monthly searches. To use this device, you can use your Gmail account.

Once signed GAKP, type head keywords (keywords with one syllable) or body keyword (keyword with two or three syllables). After that, click the Get Ideas and Keyword Ideas.
Continue to look for LTK (keywords that have four or more syllables).

For example, I typed keywords job interview questions.
From the results that appear GAKP, I found the following two LTK.

2. Viewing Google Suggestion

After looking at keywords in GAKP,i continue to see a suggested query or keywords that appear in Google Suggest. For this purpose, type in the keyword you are looking for and see what Google suggested.

For example, when I type keywords Google.co.id job interview questions. The search engines bring up 4 keywords 3 of which are LTK.

3. Looking at the Searches result related to Google search

The last way is viewed Searches related to Google search results. Searches related To what a collection of keywords associated with a keyword that is never used by Google users.

Therefore, type the keyword in Google.co.id Scroll down your computer and view Searches related to.

From a number of LTK, which one should you choose? Simply, select a convenient LTK you write and the number of search under 500 (if your blog is new).

Number of search results LTK Google Suggest and Google Searches related to can be seen in GAKP. Stages like the first way.

As you can see, it is quite easy to find LTK in Indonesian.
You do not have to use a lot of, let alone paid. Try to use all three of the above right now. I always use the three ways to find LTK for my Indonesian blogs.


Expert Lheeman

What Is Long Tail Keyword ?

What Is Long Tail Keyword ?
What Is Long Tail Keyword ? - All what you need to know abouit Long Tail Keyword and how to use it.

You probably already know that the keywords (keywords) are words or phrases that Internet users type in the search box to search engines, such as Google, to find the information they are looking for. But, you know what the long tail keywords?

For me, long tail keywords (LTK) not uncommon. I know the term LTK first time around the beginning of 2012. A year later I explore LTK as the main key words in dozens of niche my English blog monetized with Google AdSense or Amazon affiliate.

Do not worry if you do not already know LTK. Below is an explanation of what LTK is, complete with examples and useful to you.

1. Definition of LTK

Many SEO practitioners who divide keywords into three categories, namely head keyword, body keyword, and LTK.

Head keywords are keywords that consist of a single word (eg, acne). Body keywords are keywords that consist of 2-3 words, eg cystic acne and eliminate cystic acne. Meanwhile, LTK is a keyword which consists of four or more words, such as how to eliminate acne stones.

Need another example of the third category of these keywords?

2. Benefits of LTK

There are at least four benefits that you can get when shooting LTK on your posts.

a) easy to make posts

LTK very specific that makes creating posts. For example, if you made a post about acne, you will be relatively difficult to write because they have to peel all aspects of acne.

Another case if you make a post about how to get rid of acne stones. You do not need to peel all aspects of acne, but focus on the removal of acne stone building.

b) a low level of competition in the search engines

LTK generally have fewer searches than the other two categories of keywords. Because these numbers, many bloggers are not aiming LTK thus becomes a low level of competition in the search engines. Thus, the chances of your posts that target LTK go to page 1 of search engines increases.

c) high conversion

LTK generally have higher conversion. This conversion will greatly assist you when selling the product.

For example, in your post about how to get rid of acne stone, you are offered the drug to get rid of acne. Now, visitors who read your posts and have a problem with cystic acne will be more interested in buying your product.

Indeed LTK limited market segment. However, if accumulated from diverse LTK, the number will increase significantly.

d) Can enter the page one with head or body keyword

If you are using LTK and optimising drill, you have a chance also to go to page 1 of Google for keyword head or body. Really?

Yes, I experienced this dozens of times so it could make Indonesia a renowned SEO experts by surprise. A recent example can be seen in the ebook How to Write Posts Quality.

As you can see, LTK is easy to understand. So, after reading this post, I am optimistic that you know what is LTK. Apart from that, the next post I will inform you of the easiest ways to get LTK.


Expert Lheeman

How to Activate Akismet Plugin for WordPress Blog in a Simple Ways

How to Activate Akismet Plugin for WordPress Blog in a Simple Ways
Steps on How to Activate Akismet Plugin for WordPress Blog in a Simple Ways to Stop Spam Comments

Akismet is effectively used to ward off spam comments in a self-hosted WordPress blog which comments section is not closed or is not removed. Unfortunately, after installing Akismet, a lot of bloggers who can not activate it because it is constrained API Key.

If you are one of them, do not worry. Akismet activate it easily. The following step by step you need to do.

A. Obtain API Key

To activate Akismet, you need API key, is not it? API key is composed of free and paid version. Of the two versions, you can simply use the free version of the API key. To get it, do the following steps.

1. In the description of the Akismet plugin you have installed, right-click to Sign up for Akismet plan.

2. In the Akismet site that appears, click the button GET AN Akismet API KEY.

3. You will see a page Signing up for Akismet with WordPress.com. Enter your email address and create a username and password on registration of the three boxes provided. After that, click the Sign up button.

4. You will see four Akismet Plan. Of the plan number, select Basic and press the button GET STARTED.

5. You will see a page that one of its parts is a Payment Method. Ignore the part, and focus to the Akismet Basic. Swipe left black button that contains the $ 36.00/YEAR thus be $ 0.00/YEAR.

6. Payment Method section will be changed to the Contact Info. Type in your first and last name in the two boxes provided (you are free to use any name).
After that, click the Continue button.

7. You will see a notification of your registration complete success with API Key.

8. Copy the API key.

B. Enable Akismet

After getting the API key, the next step is to enable Akismet.
Therefore, perform the steps below.

9. Go back to your blog. In the Akismet plugin, click the Settings link.

10. Paste box API Key Manually enter an API key. After that, click the button Use this key.

11. You will see a notification that Akistmet active.

As you can see, it is not difficult to activate Akismet. Try one step above to enable Akismet on your WordPress blog so the blog is free from the invasion of comment spam. Good luck!


Expert Lheeman

How to Create Horizontal Lines in the post or page on WordPress

How to Create Horizontal Lines in the post or page on WordPress
Guidelines on How to Create Horizontal Lines in the post or page on WordPress Host

One of the interesting things when released ebook on How to Write Posts Qualified is by adding a horizontal line on the Testimonials page sales (sales letter) the ebook. With the horizontal lines, each with a clear testimony of making it more attractive.

Believe it or not, even though I've been using WordPress since 2015 on my music niche site, I learned how to create a horizontal line when I made the sales letter. It was by chance, without searching on Google or read totorial on other people's blogs.

Regardless, if you want to make a line like that in the post (Post) or page (Page) on your WordPress blog, here stage by stage.

1. Create Post - new Page (see How to Create a Page). If you've made it, edit the Post - Page.

2. Navigate to the text you want by horizontal lines. After that, place your cursor at the end of the text.

3. Click the Horizontal Line icon.

4. The horizontal line will appear below the text.

5. Repeat steps 2 and 3 for other text that was about to be given a horizontal line.

6. Publish or update Post/Page.

7. See the results by going to the Post/Page.

The horizontal line is useful for separating or clarifying certain parts of the posts or pages of your WordPress blog. Try one step above if you want to use a line like that. Good luck!


Expert Lheeman

How To Easily Install Google AdSense Ads in WordPress

How To Easily Install Google AdSense Ads in WordPress
Simple Ways on How To Easily Install Google AdSense Ads in WordPress Site

In the previous post I cover How to Display Both Text and Image Ads for Google AdSense.

The following step by step is an explanation on how to install Google AdSense ads using the plugin.

A. Install the plugin Quick Adsense

To install and activate the plugin Quick Adsense, all what you need to do is:

1. Log into your WordPress blog. Please remember, I mean here is a WordPress blog WordPress blog which uses self-hosting, not WordPress.com.

2. In the Plugins feature, click Add New.

3. In the search box, type Quick Adsense and press the Enter key on your laptop or computer.

4. You will see a short description of Quick Adsense plugins. In the description, click the Install Now button.

5. On the notification that appears, click the Activate Plugin.

B. Quick Adsense Plugin Settings

Quick Adsense Plugin has been active, and it is time you install the Google AdSense ad code in the plugin. Stages as follows:

6. On the Settings feature, click the Quick Adsense.

7. You will see Adsense Quick Settings page. On the settings page, you can choose the position at the beginning of the post (Beginning of the Post), in the middle posts (Middle of post), at the bottom or end of the posting (End of post), and so on. Choose or check your ad position reviews.

For example, I chose the position of After paragraph 2 to the ad code 1 (Ads 1) and the End of the Post for the ad code 2.

Note: I chose After Paragraph 2 because the first paragraph of Karlexpert.com posts is occupied by the image.

8. In the Appearance section (), select the Posts and Page for Google AdSense ads to appear in posts and pages.

9. In the Adsense Codes, enter the Google AdSense ad code that you have previously made.
For example, box 1 Ads for Google AdSense ad code to the top of the post, and box 2 Ads to the ad code under the posts. Do not forget to select the Alignment (left, center, or right) and the margin of the ads.

10. In the Sidebar Widgets, enter your Google AdSense ad code to be placed in the sidebar.

Note: If you only make one ad code, enter the code in the box advertisements Ads 1 Ads 2, and Ads WIDGET1.

11. Click the Save Changes button to save your changes, then go to one of your posts. In the post, you will see Google AdSense ads, while Google AdSense ads in the sidebar has not yet appeared.

12. To bring up the Google AdSense ads in the sidebar, click the Drag to Sidebar on the right of Ads on the Sidebar Widgets.

13. You will see the Widgets, widget place AdsWidget1 (Quick Adsense) is located. Drag (slide) the widget to your sidebar, such as the Primary Sidebar.

14. Open your blog to check Google AdSense ads that appear in the Sidebar.

Note: If you've made a Google AdSense ad code, it took 5-10 minutes for Google AdSense ads to appear in posts, pages, and the sidebar.

C. Remove AdSense Ads in Specific Page

Quick Adsense Plugin has a feature to remove the Google AdSense ads on certain pages, such as pages About, Contact, and Archive. The following step by step must be applied in using the feature.

15. On the Dashboard of your blog, click the Pages feature so that it appears on all of the pages you have created.

16. Go to a page you want to removed his Google AdSense ads. Once open, click tabText that appear related tabs Quick Adsense.

17. Point your mouse at the end of the text of the page, then click the No Ads to remove the Google AdSense ads on those pages. No Ads Code will appear in the final text of the page.

18. Click the Update button to save the changes on the page.

19. Perform steps 15 s.d 18 for other pages need to lose its Google AdSense ads.

Site D. Authorization

If you put AdSense ads on a blog, either manually or using plugins, the blog should be authorize to be earnings recorded in your Google AdSense account.
The steps are as follows:

1. On your Google AdSense account, click the Settings feature in the top right.

2. Click Access and authorization.

3. Enter your blog domain (without http and www) in the box provided. After that, click the Save button and you are good to go....


Expert Lheeman